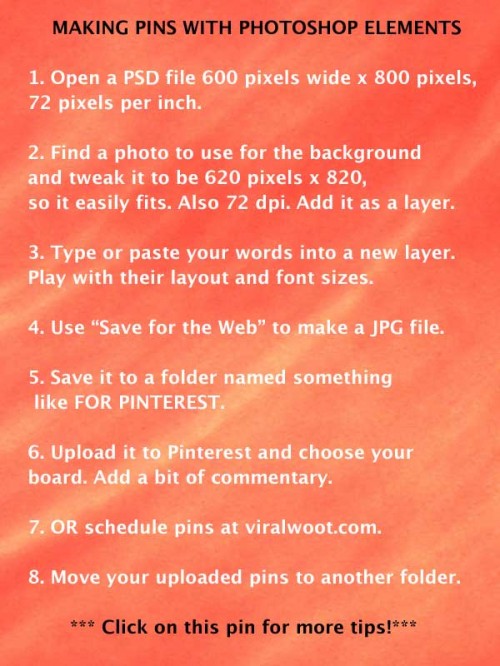
How I Make My Pinterest Pins
Here’s how I make the pins I put up on Pinterest. Maybe this will be helpful to you. There are a lot of different ways to do it, of course, but since I’ve had Photoshop Elements for years, I use it.

Some notes on the steps:
1. I like to use 600 pixels wide, 800 tall, and 72 pixels per inch for the resolution. I could go taller for infographics. You can use different dimensions if you wish.
2. I find a picture or texture that I want to use for the background. Since my husband Kelly has taken thousands of photos I can use, and I’ve taken quite a few myself, I look around for the one I’ll use and open it in PSE (Photoshop Elements). Even a really old version of the program would work. I often use a small part of a picture, something that makes a nice background. The background on the pin above is taken from a photo of people dancing with fabric that looks like this.
3. I find a quote I want to use. Often I do this before I choose the image file.
Sometimes it is from one of my books or websites, or it’s a quote that comes from the internet. I like to start at http://www.quotationspage.com/ and poke around there. Being a librarian by background, I like to double-check my quotes, so once I select one I paste it into a search engine search box and see if it really was said by the person the website says. If it’s a pretty recent quote, I may decide to skip it, as I like to be careful about copyright.
4. When I save for the web, I look at the quality of the image that shows up and use as low a one as I can while still being reasonably happy with how it looks, especially how the letters look.
5. To remember what I have posted and what hasn’t gone up yet, I do have two folders, one called TO PINTEREST and the other called UP ON PINTEREST.
So then it’s just uploading! I do use viralwoot.com when I do a batch of pins and want to spread them out. You can do a little for free. I wanted to do more than that but I didn’t want a monthly fee so I bought a batch of what they call seeds.

